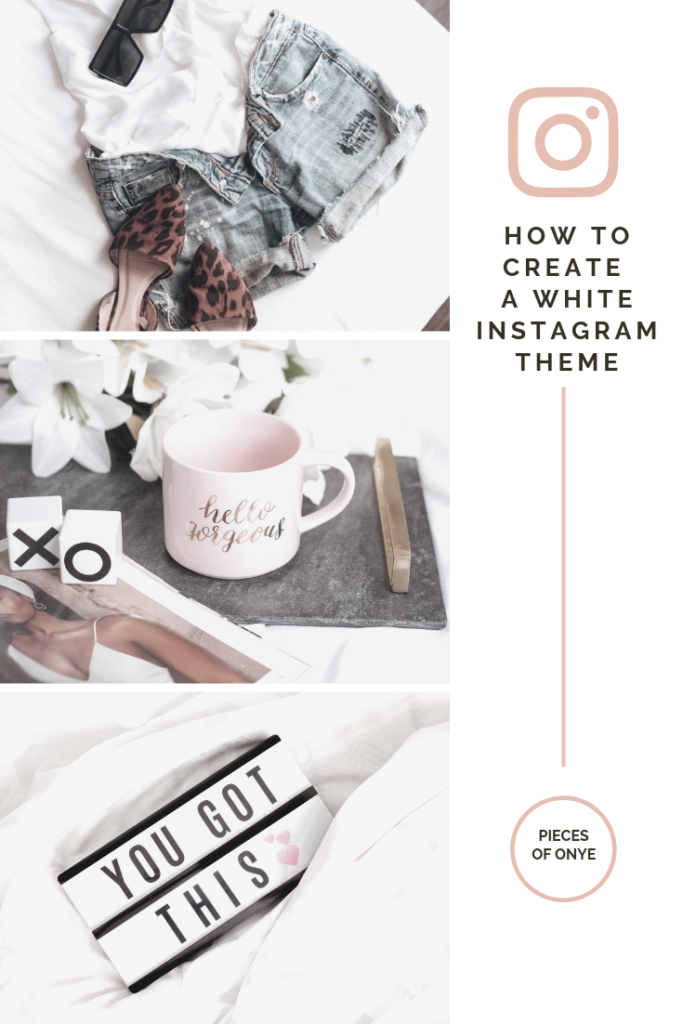
I often get questions like, “how do you create a white Instagram theme?” or “how do you get your pictures so crisp and white?”. If you’ve been wondering the same thing or if you’ve struggled with brightening up your Instagram feed, then today’s your lucky day because I’m spilling ALL the beans on how I do it. Keep reading to learn all the steps and apps I use to create a white Instagram theme.
Let’s hop right into the good stuff!
LIGHTING IS EVERYTHING
If you’re looking for a crisp, white Instagram theme, the first thing to work on is your lighting. It is trés important because if your picture is not well-lit, it will be a lot harder to brighten without the resulting image looking dull, grainy and/or poorly exposed. Inversely, if your photo is well-lit, it will only require a few tweaks to whiten it up. Luckily for you, there are a ton of lighting options available to use!
Natural Lighting
I talk about natural lighting quite a bit on this blog because natural light is the best thing since sliced bread! Truly, it is. And the great thing about natural light is that it’s free and readily available (unless you live in a deep, dark dungeon somewhere). Whether you’re taking a picture of yourself or an expertly-staged flatlay, to get the most light, you’ll want to position yourself right next to an open window to let the natural light pour on in!
Soft Box Lighting
If natural lighting is not an option for you, you may have to look into an artificial source of lighting. One of the most cost-effective options is a softbox. The right softbox can provide soft, continuous lighting that resembles the light that streams through a window.
Softboxes are not all that expensive either! They typically range in price from $50-$200 and can last for years. When I first got started as a content creator, softboxes were the first thing that I invested in and boy-oh-boy was it a worthy investment! If you’re looking for a good set to use, here is my fave: Softbox Lighting Kit
Strobe Lighting
Strobe lighting is essentially softbox lighting … on steroids! They provide a noncontinuous flash of light that is super powerful. Think of a camera flash, except much more powerful and you can control its intensity. What I love about strobe lights is that you can pair them with an umbrella or some type of diffuser to produce a soft light that mimics natural lighting. And if you’re wanting harsh shadows, simply remove the umbrella/diffuser and prepare to be wowed! These lights tend to be slightly on the pricier side, so I would recommend starting with the softboxes!
LEARN HOW TO EDIT YOUR IMAGES
Now that you have your lighting all figured out, it’s time to move on to the editing process. In order to get the bright, white images that will help you create a white Instagram theme, you’ll need to know a thing or two about editing. Down below area few editing steps that I use on my images.
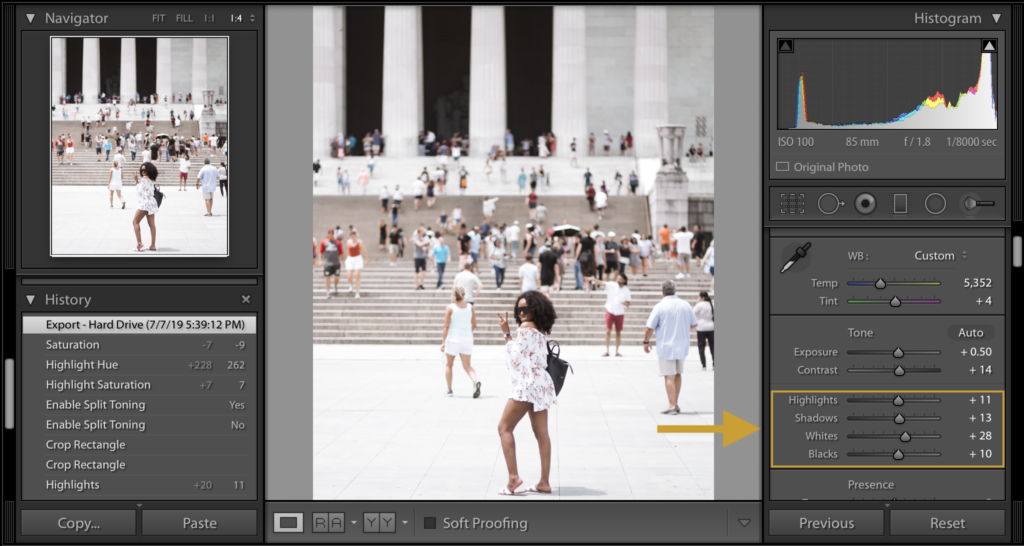
Increase the Highlights, Whites, and Shadows
If you know your way around Lightroom and/or Photoshop (Camera RAW Filter), then you’re going to love these next few tips. However, if you’re not about the editing life, feel free to skip down to “Apps & Tools”!
Okay, now back to business! When it comes to brightening an image, the first thing that people tend to increase and decrease is exposure. While this may work, it can also lead to over-exposed images. And no one wants that! So I’d recommend starting with the Highlights, Shadows, and Whites in your image.
Highlights | Increasing the highlights will brighten up the brightest parts of your image and also help bring back the details in those areas.
Whites | Increasing the whites will increase the brightness in your photo
Shadows | Increasing the shadows will help brighten up the underexposed areas (aka the shadows) in your image.
Each of these settings can also be decreased if you find that your image is a little bit too bright (aka overexposed). A little goes a long way with these settings, so try not to get too carried away! You can also play around with decreasing the Blacks to make the blacks pop and to add a bit of contrast to your image.
Tip: The best way to learn about each of these settings and the impact that they have on your photo, is by experimenting and playing around with them. Push each of them all the way to the extremes so that you can see the effect they have on your photo.
Decrease the Saturation of Yellows and Blues
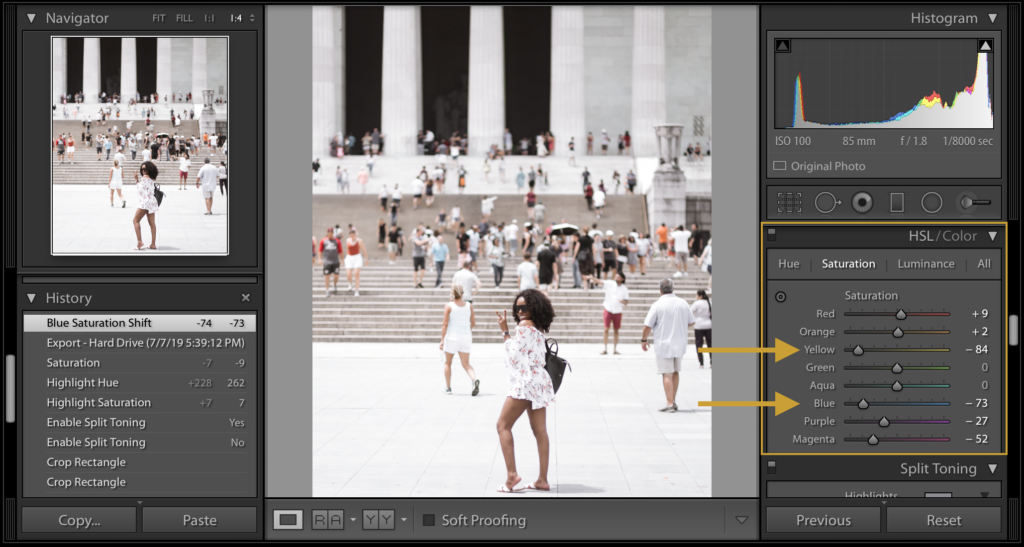
Decrease the Saturation of the Yellows and Blues in Your Images And Increase the Luminance
Have you ever edited a photo but noticed it looked a little blue or slightly yellow? This could be fixed by reducing the saturation of the blues and yellows in your image and also increasing the luminance of those same colors. These adjustments can be made in the “HSL/Color” section (highlighted above). To access the “Luminance” settings, simply click on “Luminance” right next to “Saturation”.
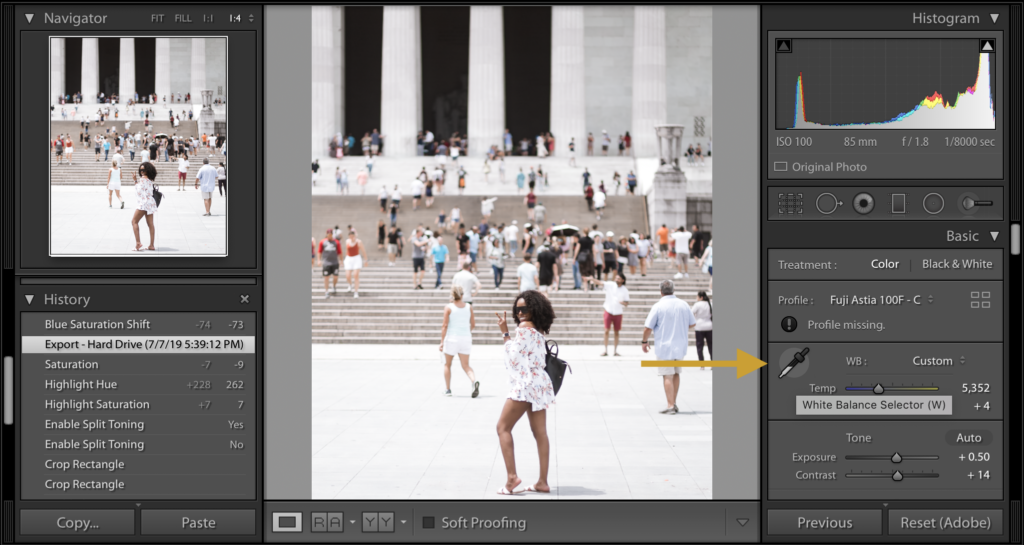
Adjust the white balance
White balance is a setting on your camera which is used to determine how colors are captured in different types of lighting. When your white balance is properly set, your camera will produce accurate colors in your images. The main thing to note is that when your image is blue in color, you’ll want to warm it up a bit (add more yellow/orange). If it is yellow in color, you may need to add blue to cool it down a bit. It’s also important to note that there is no steadfast rule for determining the proper white balance. Some images call for a lot of warmth (e.g. if you’re going for the ‘Golden Hour’ look), while others call for a cooler tone. It’s really up to you and your creative eye.
*Quick Edit – if you’d rather not play it by eye, you can use the “White Balance Selector” tool to automatically adjust the White Balance of your photo. To do this, simply select the tool, and drag the selector over to a neutral color in your image (e.g. teeth, white shirt, grey wall, etc.). Selecting this neutral color will cause Lightroom/Camera RAW Filter to automatically correct the white balance in your photo. If you’re not satisfied with the correction, you can select a different neutral color in your image.
MUST-HAVE APPS & TOOLS
If Photoshop and Lightroom are not your thing, don’t you fret! There are a ton of apps that can help you achieve crisp, white images. I actually did a blog post on my favorite editing apps that you should check out next: 9 Essential Instagram Apps and Tools For Bloggers and Influencers. I’ll still go ahead and highlight my fave apps down below!
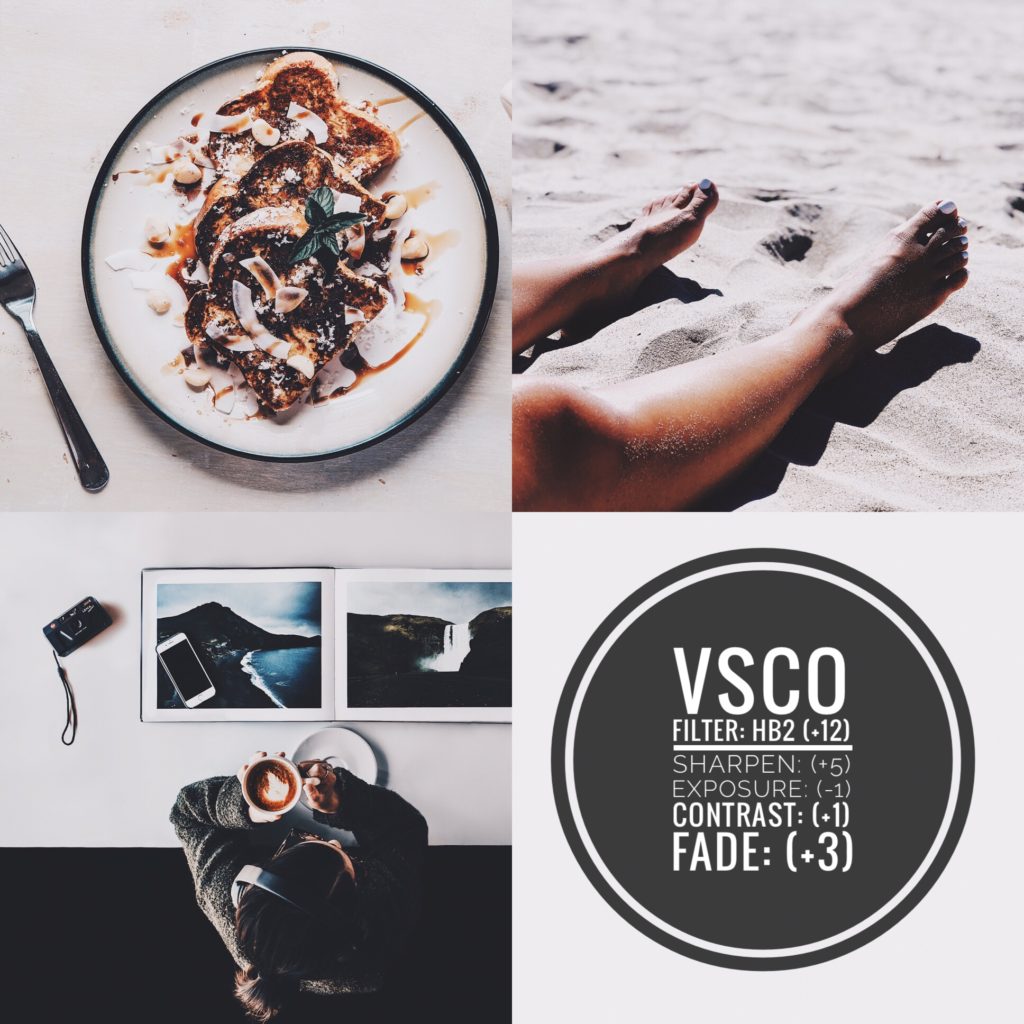
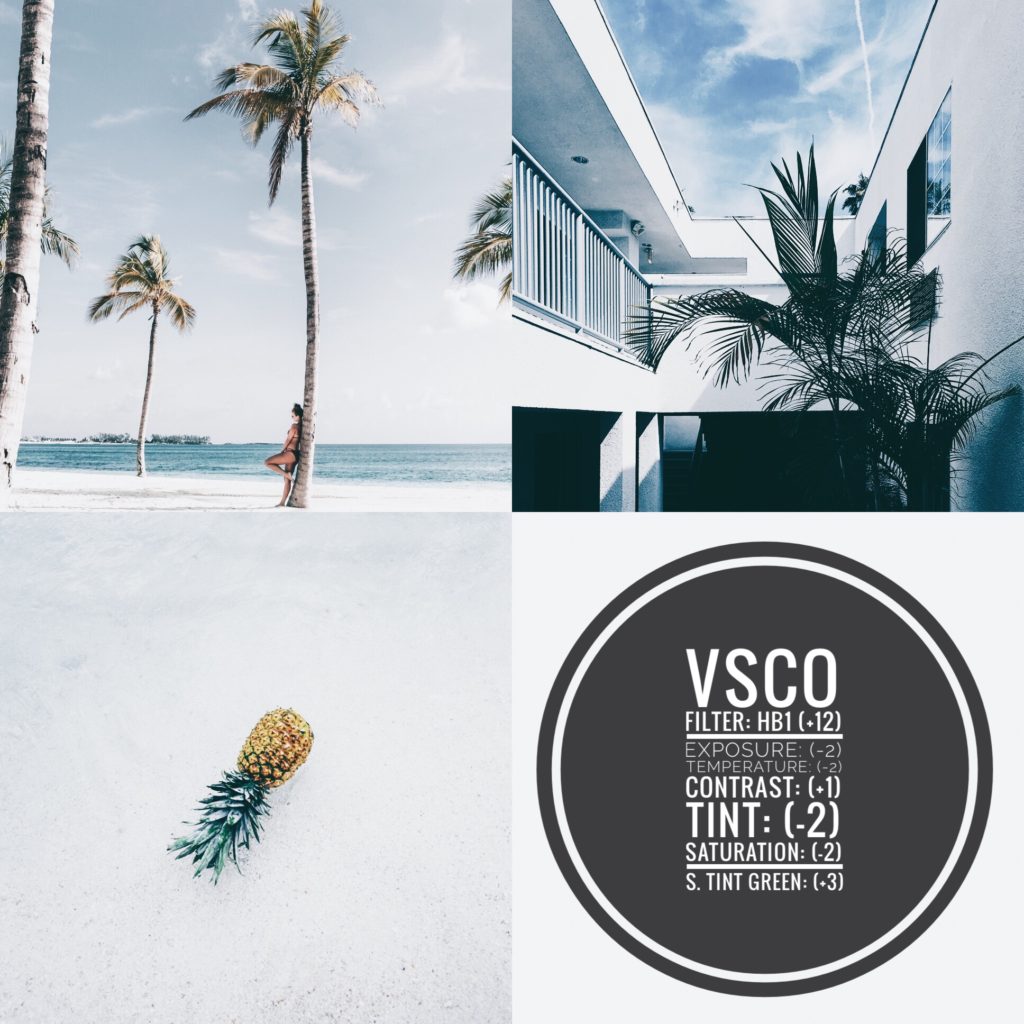
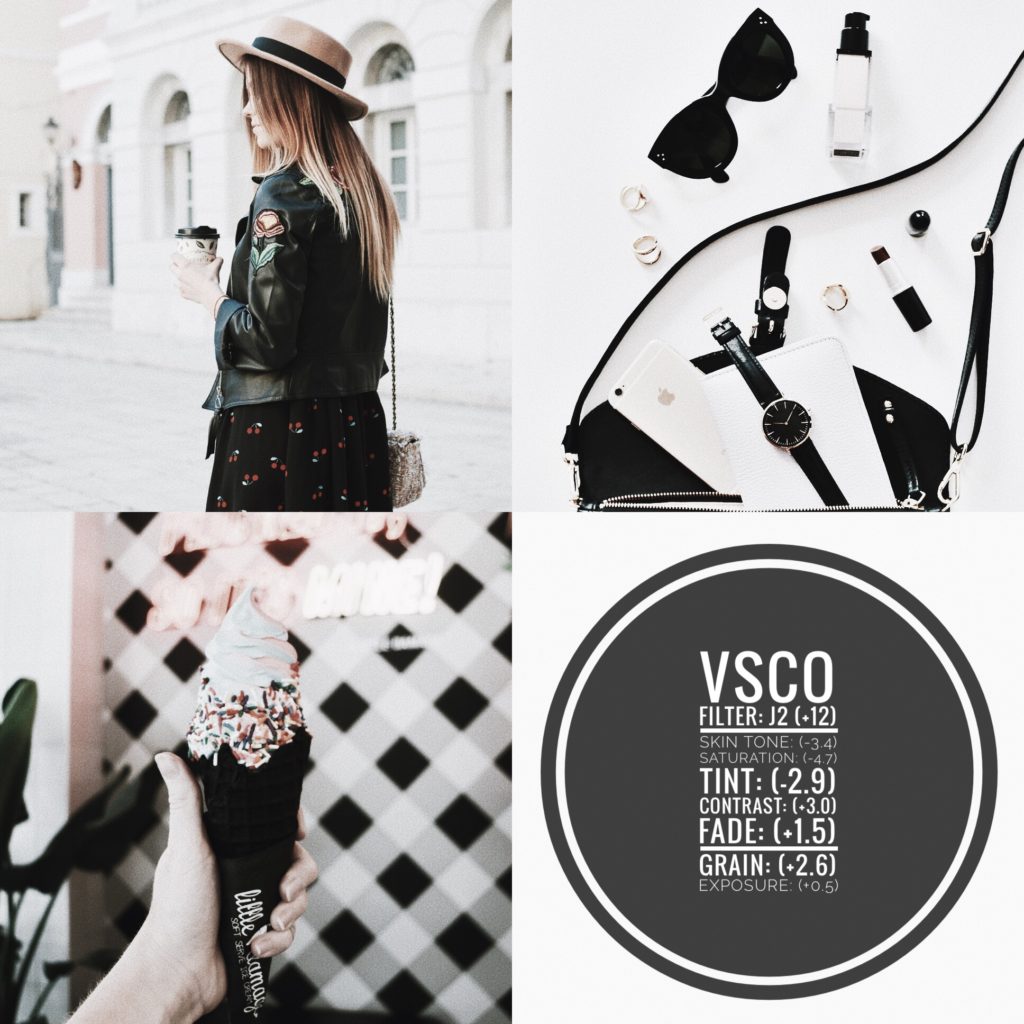
VSCO
VSCO is the OMEGA of editing apps. It offers tons and tons of photo (and video!) filters that you can use to quickly edit your image. The free version offers a few basic filter options, but if they’re not enough, you can purchase preset packages. My favorite filters to use for whitening up my images are HB1, HB2, S1, and S2. You may still need to make a few adjustments after applying the filters to brighten the image up even more.
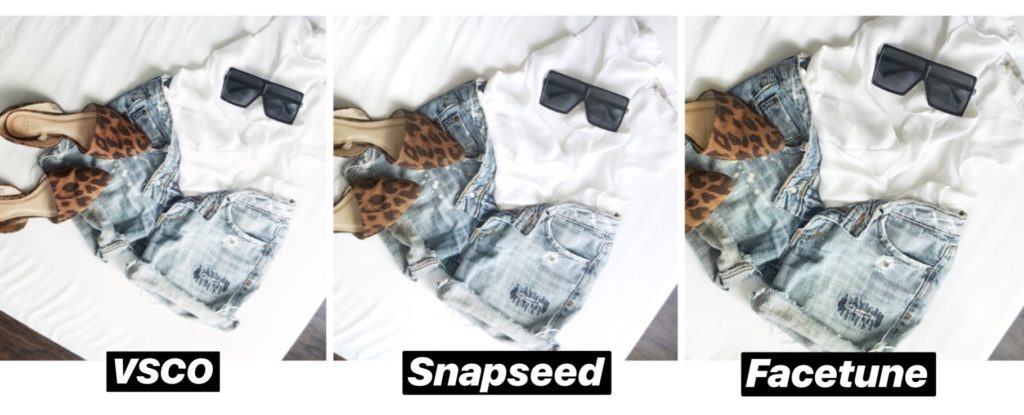
Here are a few filters and edits you can try on your images to help you create a white Instagram theme!
Snapseed
Snapseed is another powerhouse editing tool that I love to use. Below are my go-to features for whitening up my images:
“Tune Image” – This is where you can find commonly used editing options like brightness, contrast, and saturation
“White Balance” – Photo looking a little blue? You can use this feature to add a little warmth to your image
“Selective” – This one little feature is the main reason why I keep Snapseed on my phone. It allows you to select certain areas of your image and make edits to ONLY those regions of your photo. Say whaaaat? Yes! This is how a lot of your favorite bloggers and influencers create those beautiful white and desaturated backgrounds. This is it, people!
Facetune
Facetune has an awesome feature called “Whiten” that allows you to whiten select areas of your photo while leaving the rest of the image untouched. This is great for whitening the background of images or any areas that may be too dark.
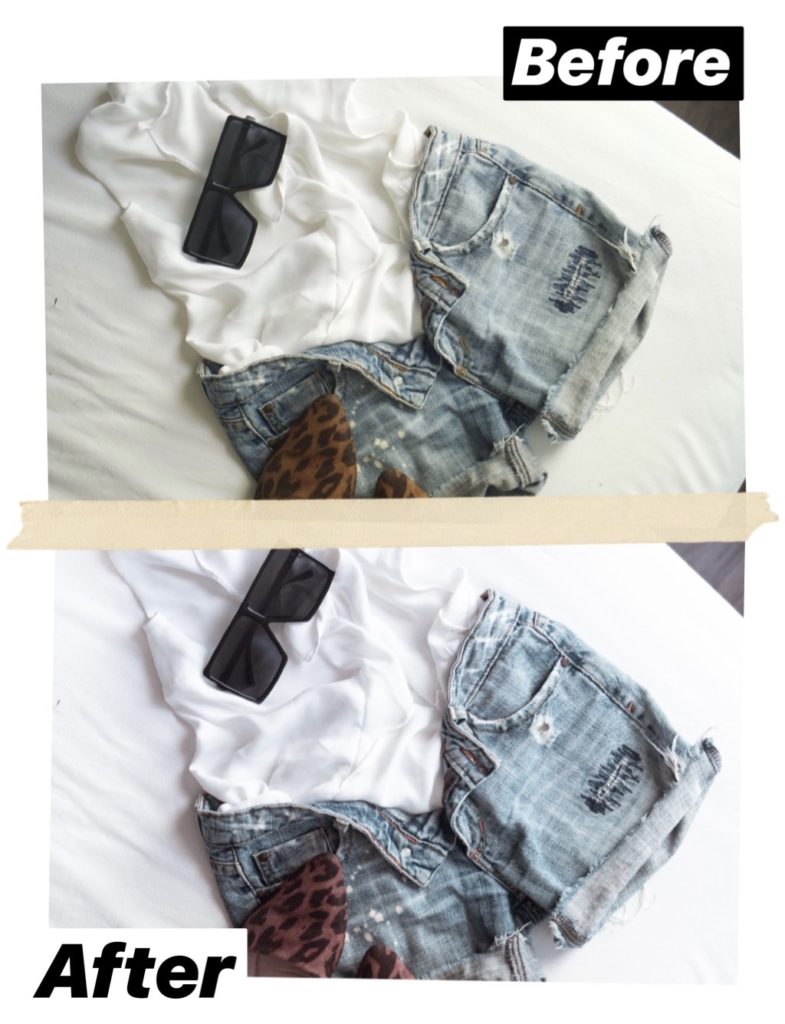
Here’s a look at an image that I edited using all of the aforementioned apps. No Photoshop or Lightroom at all!
A FINAL NOTE
To ensure that you maintain a crisp, white theme across Instagram, you’ll want to shoot most of your images against a bright/white background. For example, shoot your flatlays on a white bedsheet and shoot your lifestyle images against a white wall or building. This goes a LONG way in helping you maintain the white theme on your Instagram feed.
And that’s all she wrote folks! I hope these tips help you create a white Instagram theme that you will love! If you found this helpful and would like to see more, please be sure to comment and share!