I recently received a PR package from Profusion Cosmetics and I thought this would be the perfect opportunity to do an Instagram flatlay walkthrough! Take a second to grab your pen and paper and let’s get started!
What You’ll Need
Here are a few items that you’ll need to create a double-tap worthy Instagram flatlay:
1. Backdrop – No flatlay is complete without a nice looking backdrop. Fortunately for you, there are an endless number of options from which to choose. Some of my favorite places to look for backdrops are Amazon, Samy’s Camera, and any arts and crafts store. For the purposes of this walkthrough, I’ll be using a white bedsheet that I picked up from Target, specifically for flatlays.
2. Camera – As you can imagine, it would be quite difficult to capture a flatlay without a camera. Actually, it would be impossible lol. I typically use my Canon 70D camera for my flatlays. However, that doesn’t mean that you need a big expensive camera to create a beautiful Instagram flatlay. If you have a newer phone, chances are that it’s going to take really good high-resolution images. There’s no need to break the bank in the name of a flatlay (Although phone prices are getting a bit ridiculous these days!).
3. Lighting – Before you start staging your flatlay, you’ll want to figure out what your lighting setup will be. I’ve always advocated using natural light whenever possible. Doing so will get you the best Instagram flatlays, without a doubt. However, if you do not have access to a lot of natural light, you’ll want to use artificial lighting. I typically shoot with two soft boxes that I purchased here on Amazon.
4. Props – You can’t forget the heroes of any Instagram flatlay, your props. You not only want to determine what you’ll be shooting, you also want to figure out which props will be your hero props and which will be your side joints.
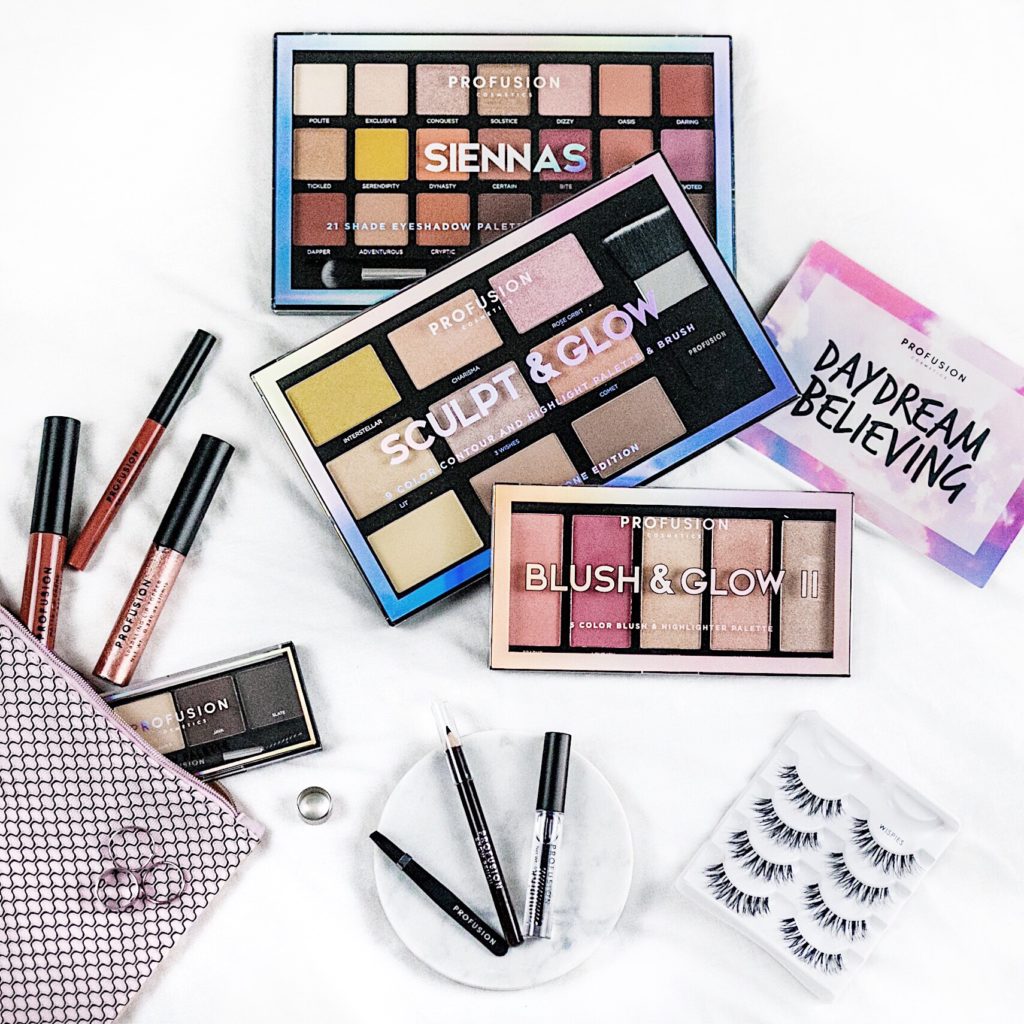
Instagram Flatlay Walkthrough
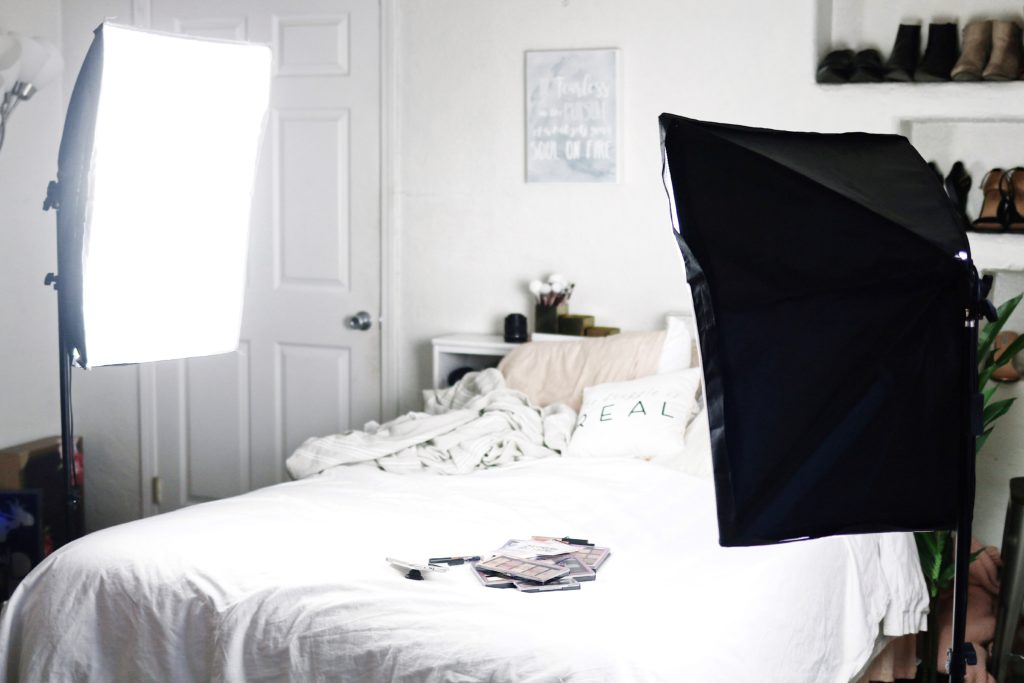
Figure out Lighting: If you’re using natural lighting, you’ll want to work near a window or an open door to get the most out of the lighting. If you’ll be using artificial lighting, find your workspace and set up your lighting. It’s okay if you’re not immediately sure where to place your lights. As you start to play around with your flatlay, you can move the lights around to get the best look.

Decide on Backdrop: Once you’ve determined what your backdrop will be, go ahead and lay it down in your workspace. As I mentioned earlier, I’ll be using a white bed sheet for this Instagram flatlay walkthrough and I’ll be working on top of my bed.
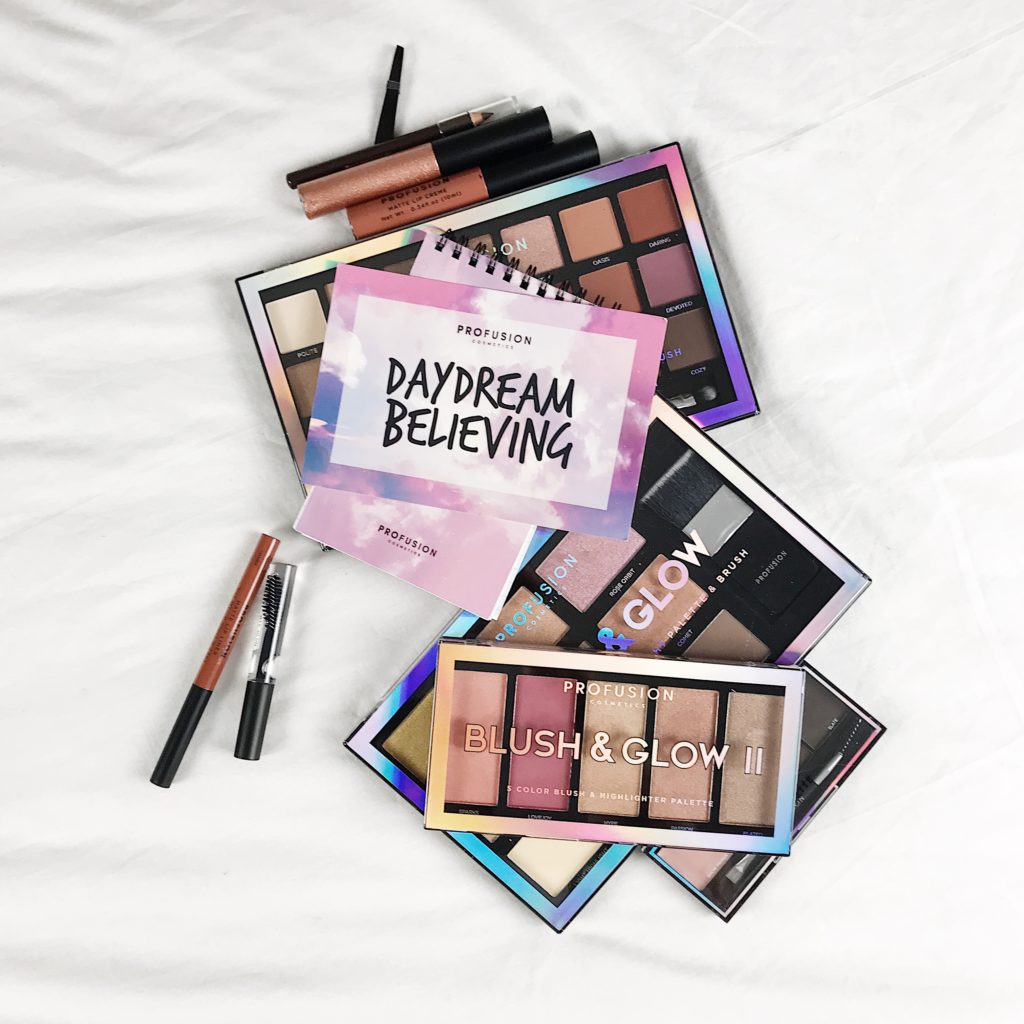
Pick Out Your Props and Decide on Theme: Sometimes you know what your theme is going to be before you even lay out your props. Other times, you’re absolutely clueless until you’ve taken a look at what you’re working with, in terms of props. For my flatlay, I’m featuring a PR package that I received from Profusion Cosmetics. Naturally, my theme will be beauty (more specifically makeup). In order for this flatlay to make sense, every prop that I use will be somewhat related to this beauty theme. I wouldn’t, for example, toss in a baseball glove because… huh? It wouldn’t make sense.
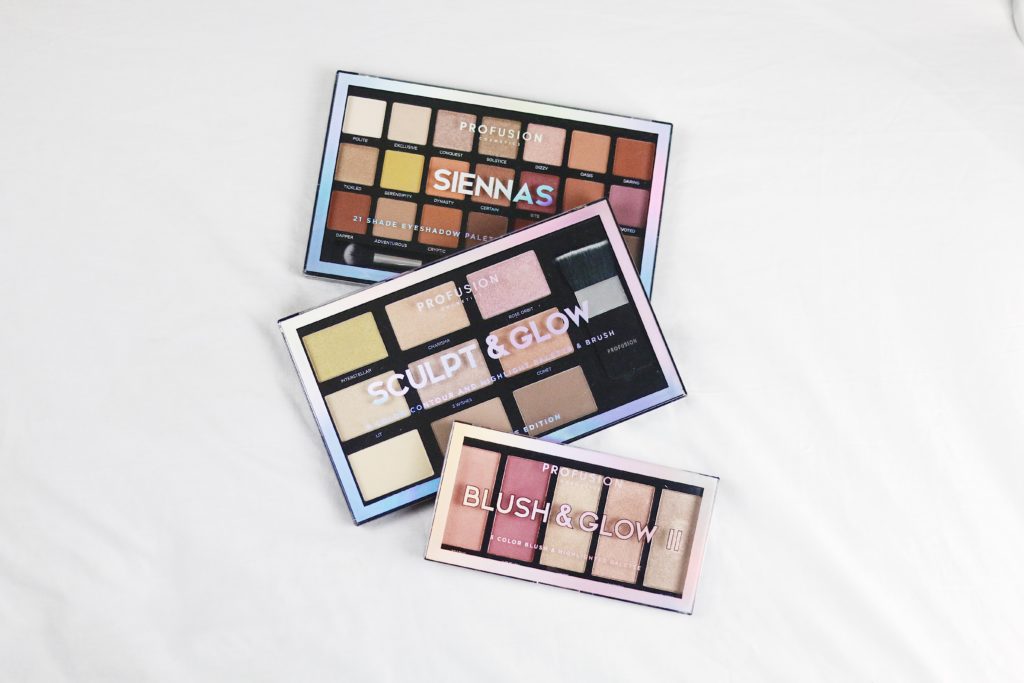
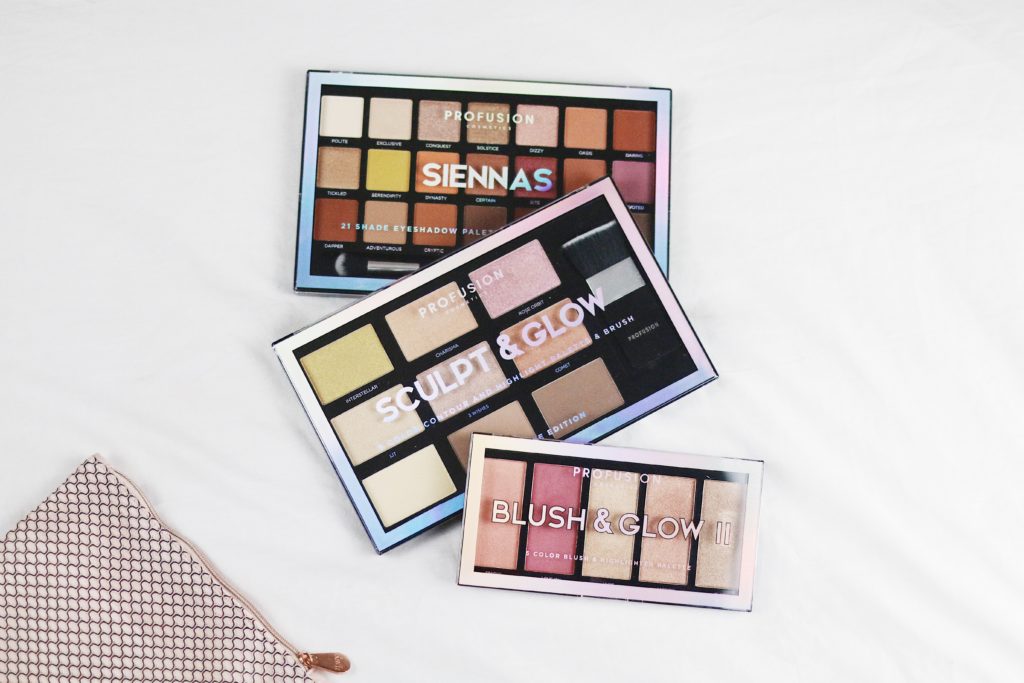
Start Building Out Your Flatlay: Now that we have all that out of the way, the fun can officially begin. I typically start with my hero products. In this case, my hero products are the largest Profusion Cosmetics palettes. I decide to stack these on top of each other since they’re a bit on the bulky side.
I then begin building out my flatlay by placing supporting props in the frame. I pull a pink makeup bag into the flatlay and place it off to the side because I don’t want it fully in the frame (it’s too bulky to be fully in the flatlay).
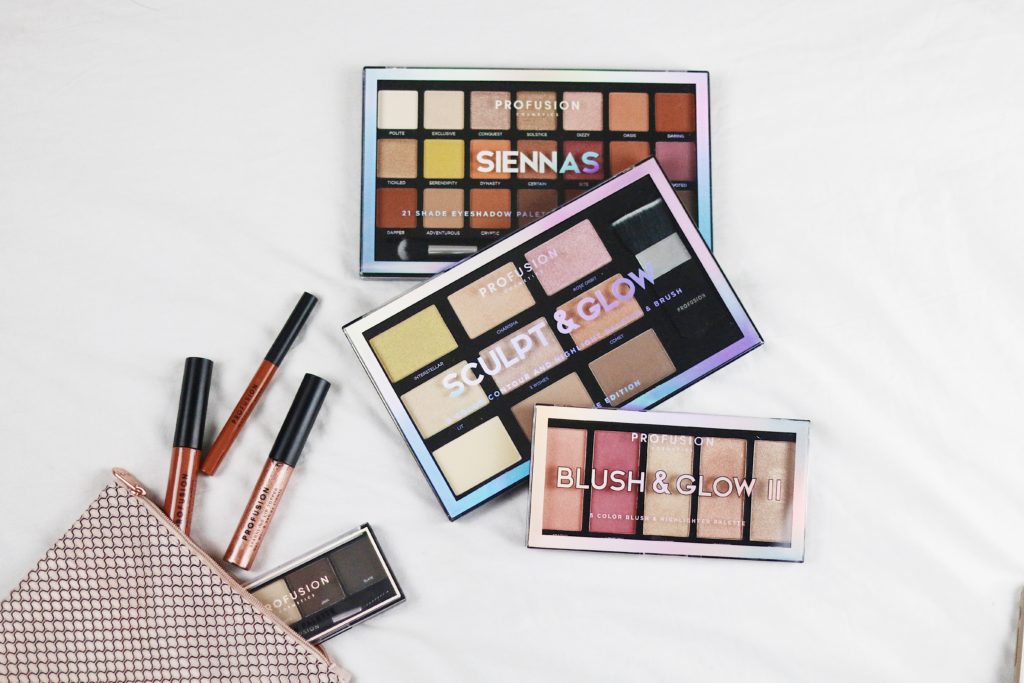
Now I ask myself, what would naturally come out of a makeup bag. More makeup, right!? Yes. So I place more of the Profusion Cosmetics products inside of the pink makeup bag. Tip: Make sure that the brand’s name is upward facing on all of the products.
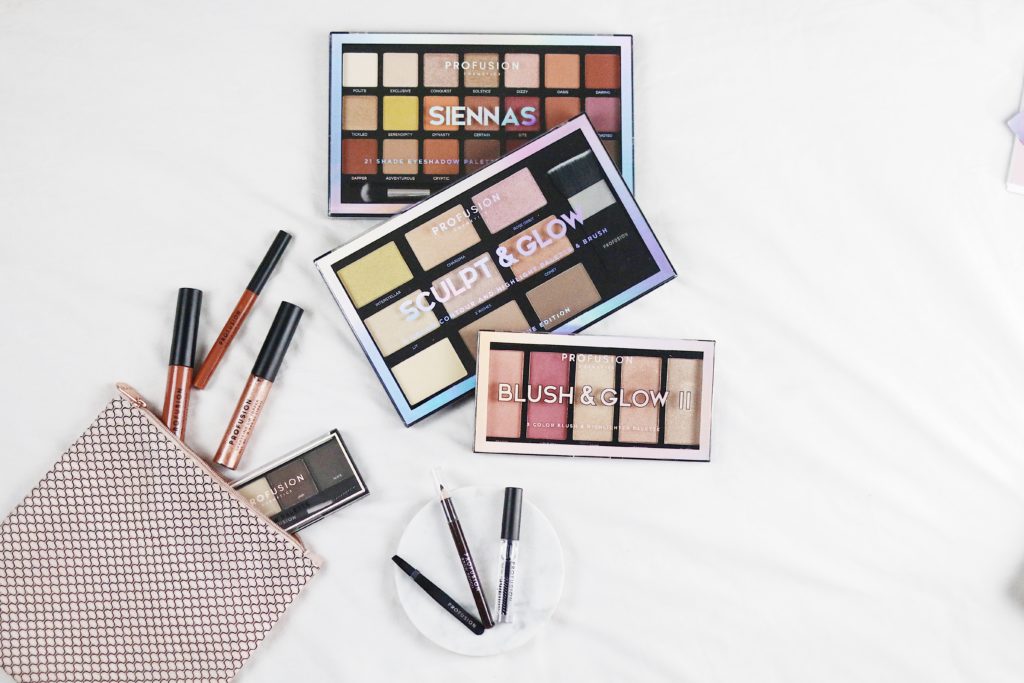
Next up, I add a small marble tray into the flatlay and place the remaining Profusion Cosmetics makeup products that I have on top.

We’re almost done with the flatlay. However, it feels a bit imbalanced to me. I want to add something that ties in the pink makeup bag a bit more. As such, I’ve added the pinkish name card that reads, “Daydream Believing”. In post, I’ll edit the color of the makeup bag more so that it matches the name card a bit better. I’ve also added in the eyelashes to fill in the negative space in the bottom right corner.
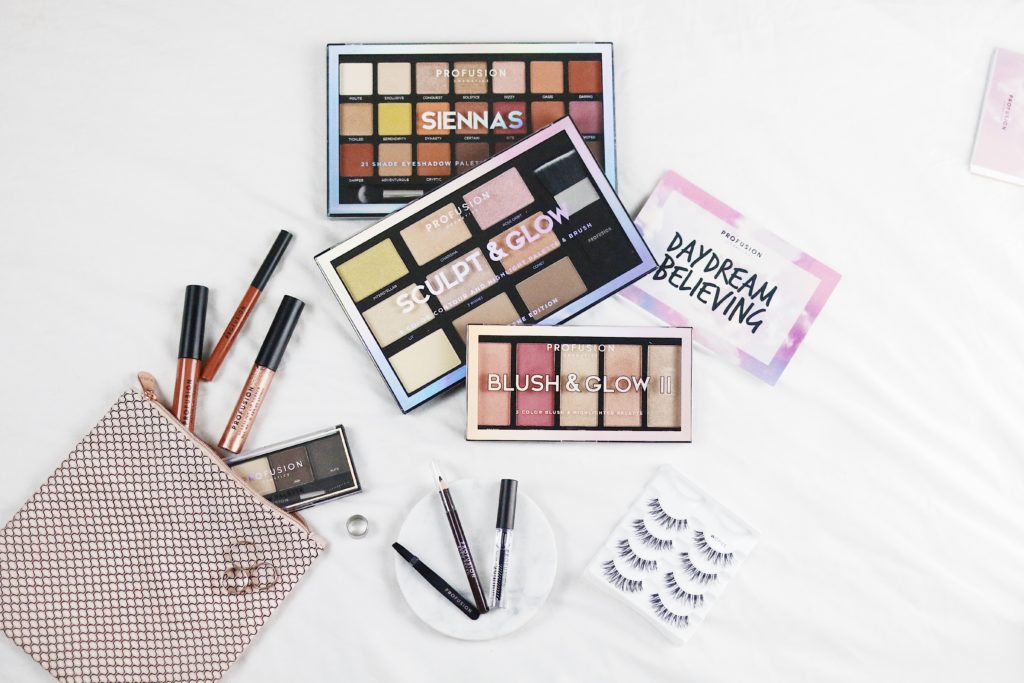
As a final step, I’ve placed a few silver rings in the flatlay to help balance things out. And that’s it for the build out!
Capture your Flatlay: Now that you’ve completed your flatlay masterpiece, grab your camera and start snapping away. For the most part, you want to capture your flatlay from high up above. However, don’t limit yourself to that. It’s still a flatlay if you decide to take the photo from an angle.
As the last step, I edited my final flatlay in Photoshop and VSCO.
And that’s it! It wasn’t too bad, was it?
Want More?
Join me and other photographers over in the PIX Tips FB Group to take part in photography challenges and to learn, share and grow together!