Oh yes! Ripped jeans have made a triumphant return to the fashion scene and my closet has been craving a pair for the longest!
Instead of going to H&M or Zara to pick up a pre-ripped pair, I decided make them myself! Here’s a step-by-step picture tutorial on how you can create your own knee-ripped jeans:
Picture Tutorial
Step 1: Find a pair of jeans that you don’t mind ripping to shreds. I purchased this pair from Target a few months back, but have never really worn them because they’re a bit BLAH! Perfect pair for this project!

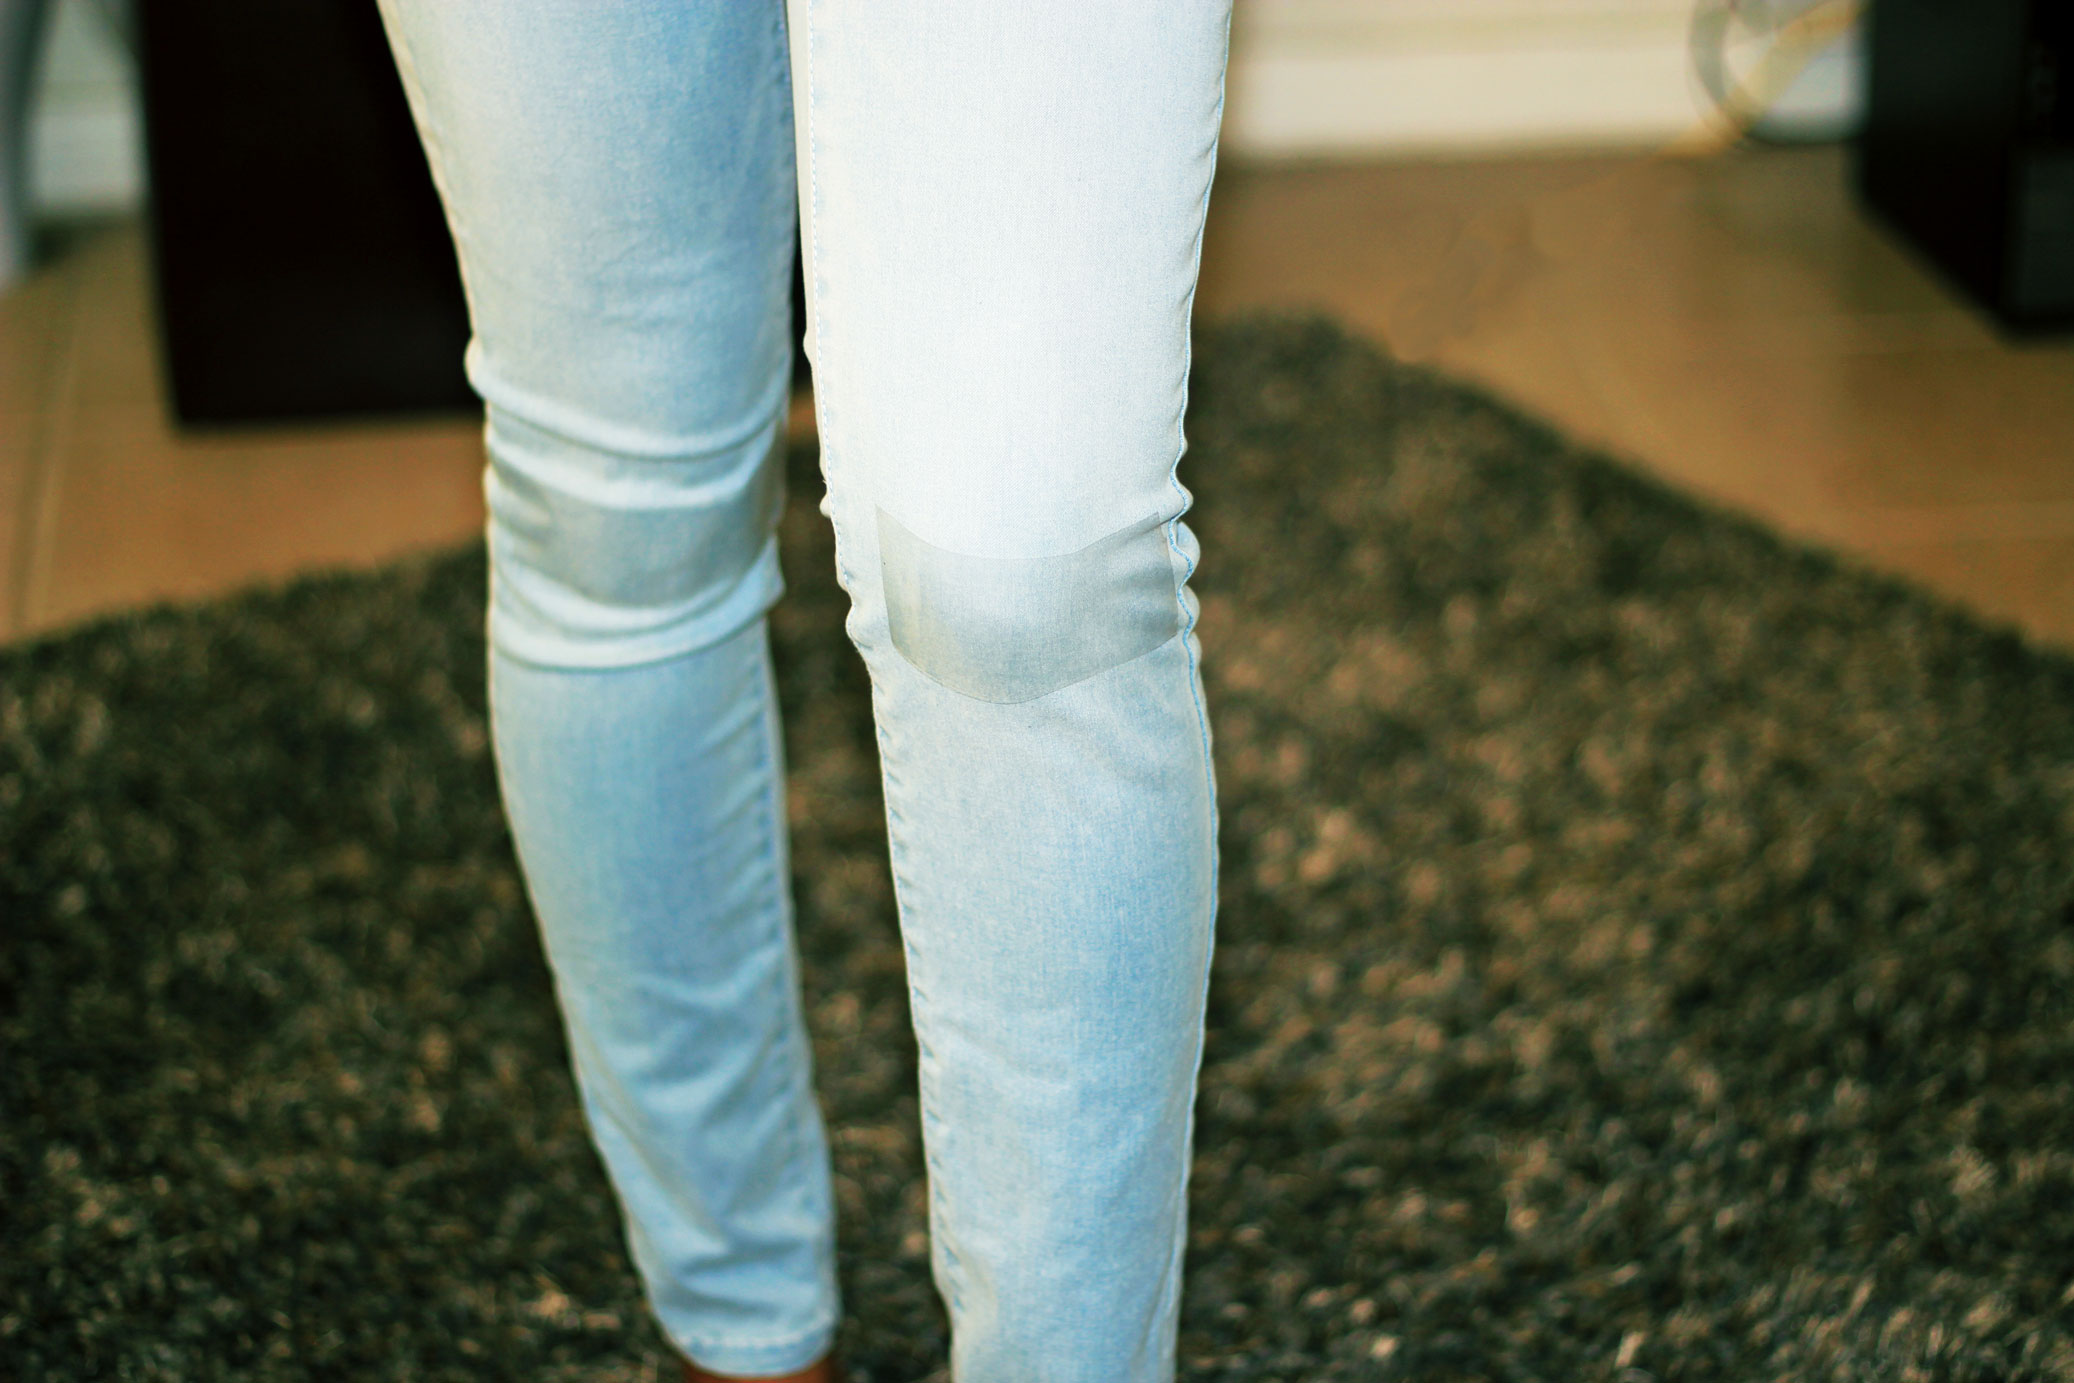
Step 2: Place tape over the areas you wish to cut. This step is completely optional. However, if you’re a commitment phobe and haven’t fully committed to the idea of cutting up your precious jeans, this step is for you! Just a little back up plan!
Please be warned that once you make the first cut, there’s no turning back!
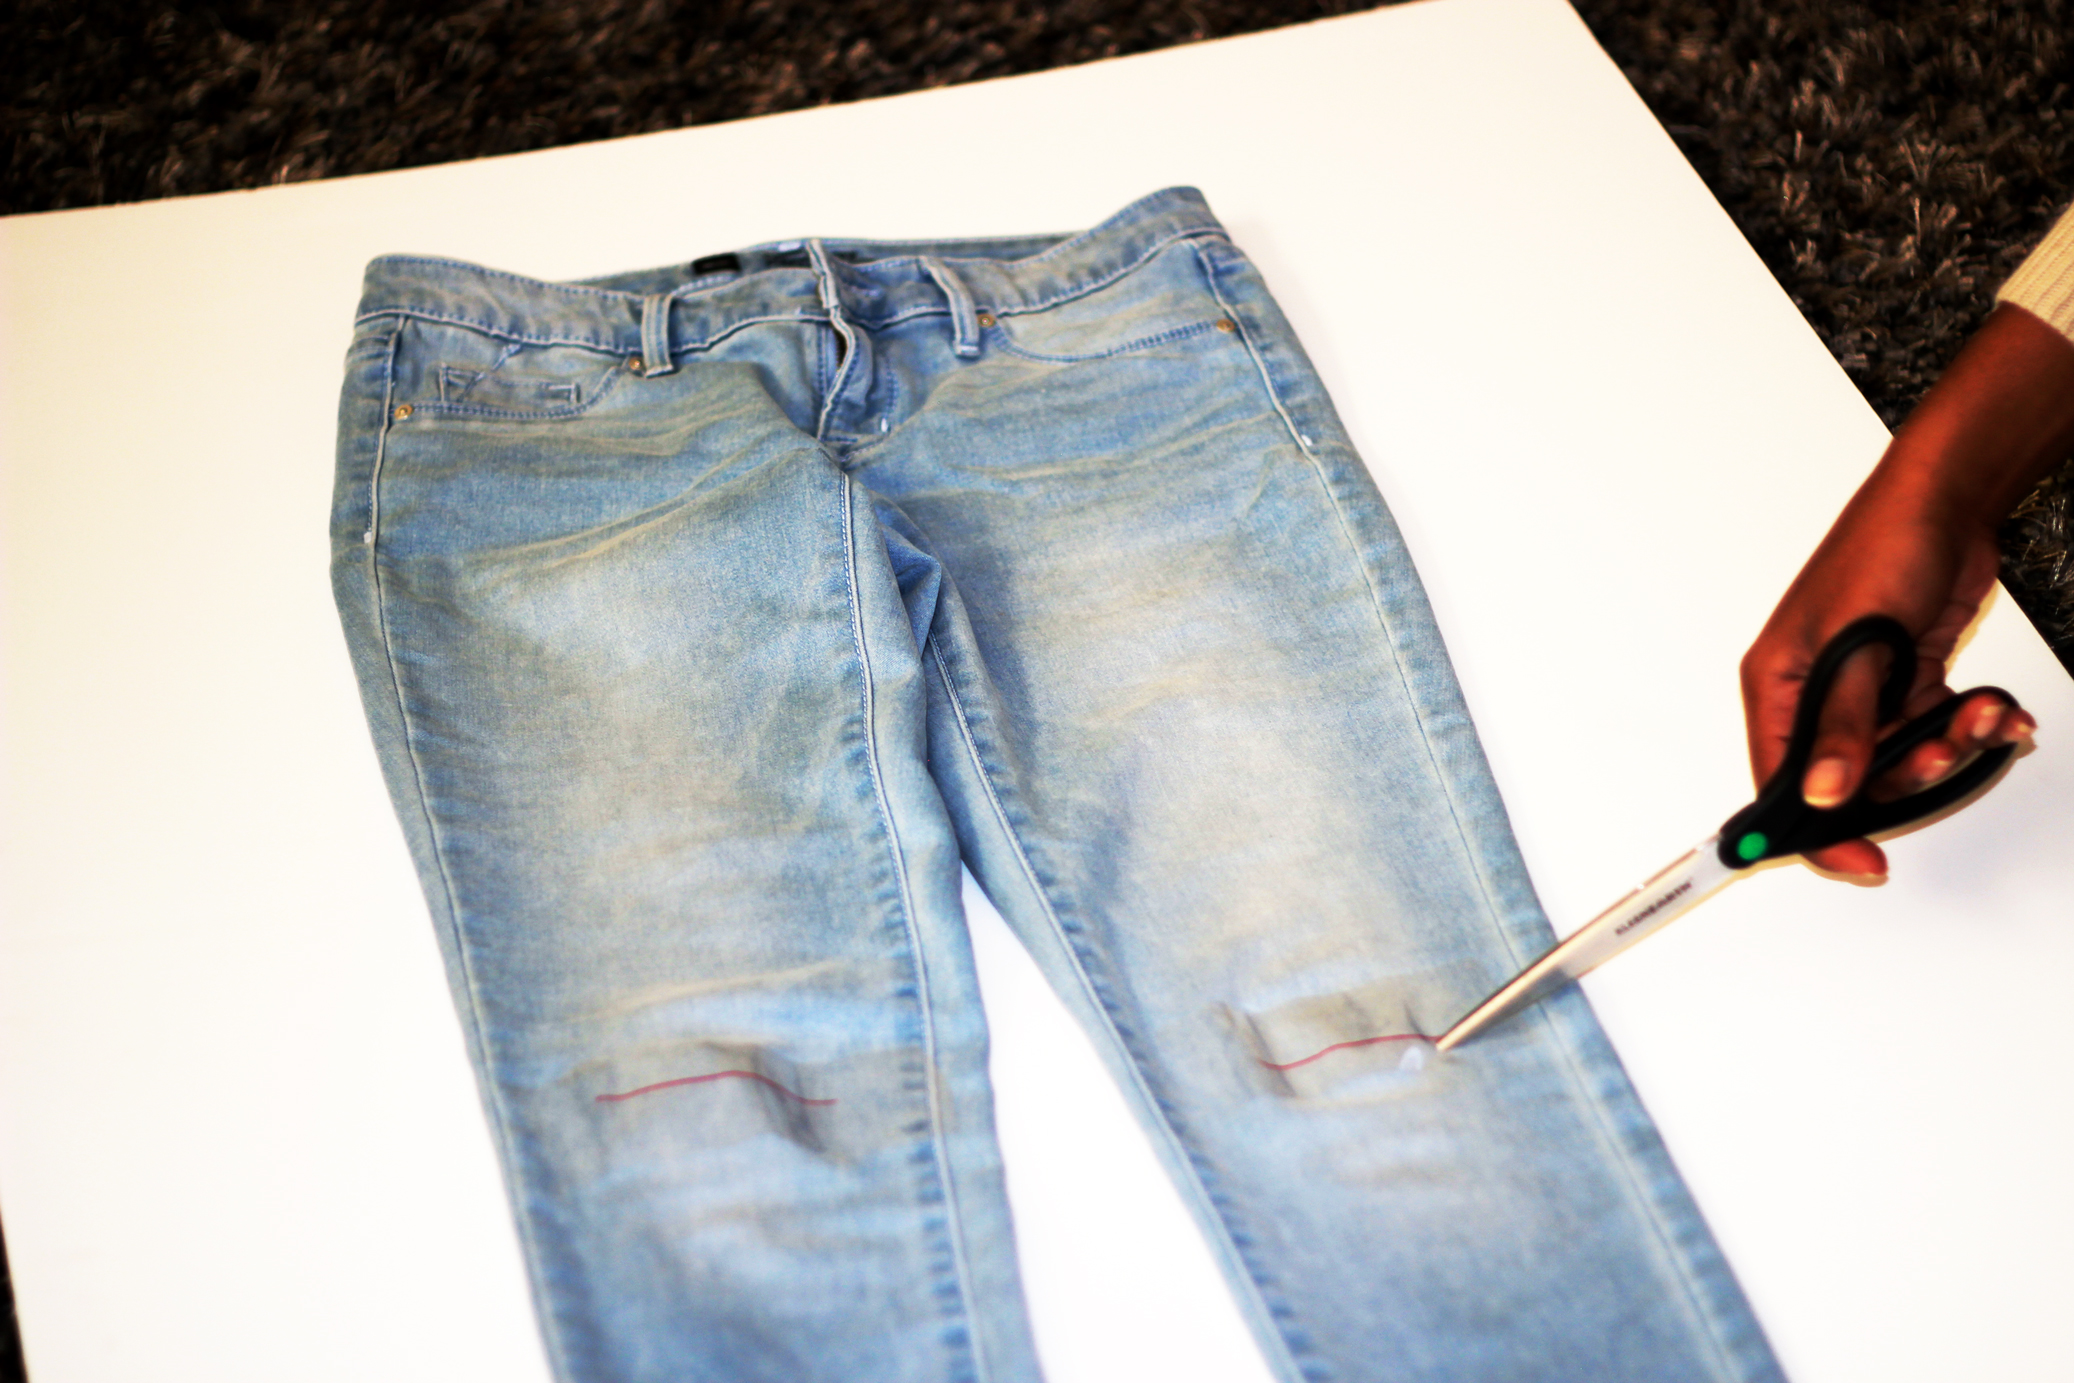
Step 3: Use a marker to note where you would like to cut the jeans open. Make sure that the lines are straight and positioned properly.

Step 4: Remove the pants! Unless you have knees of steel that can withstand being cut by scissors, this step is important.
Once the pants are off, cut along the lines that you’ve created.
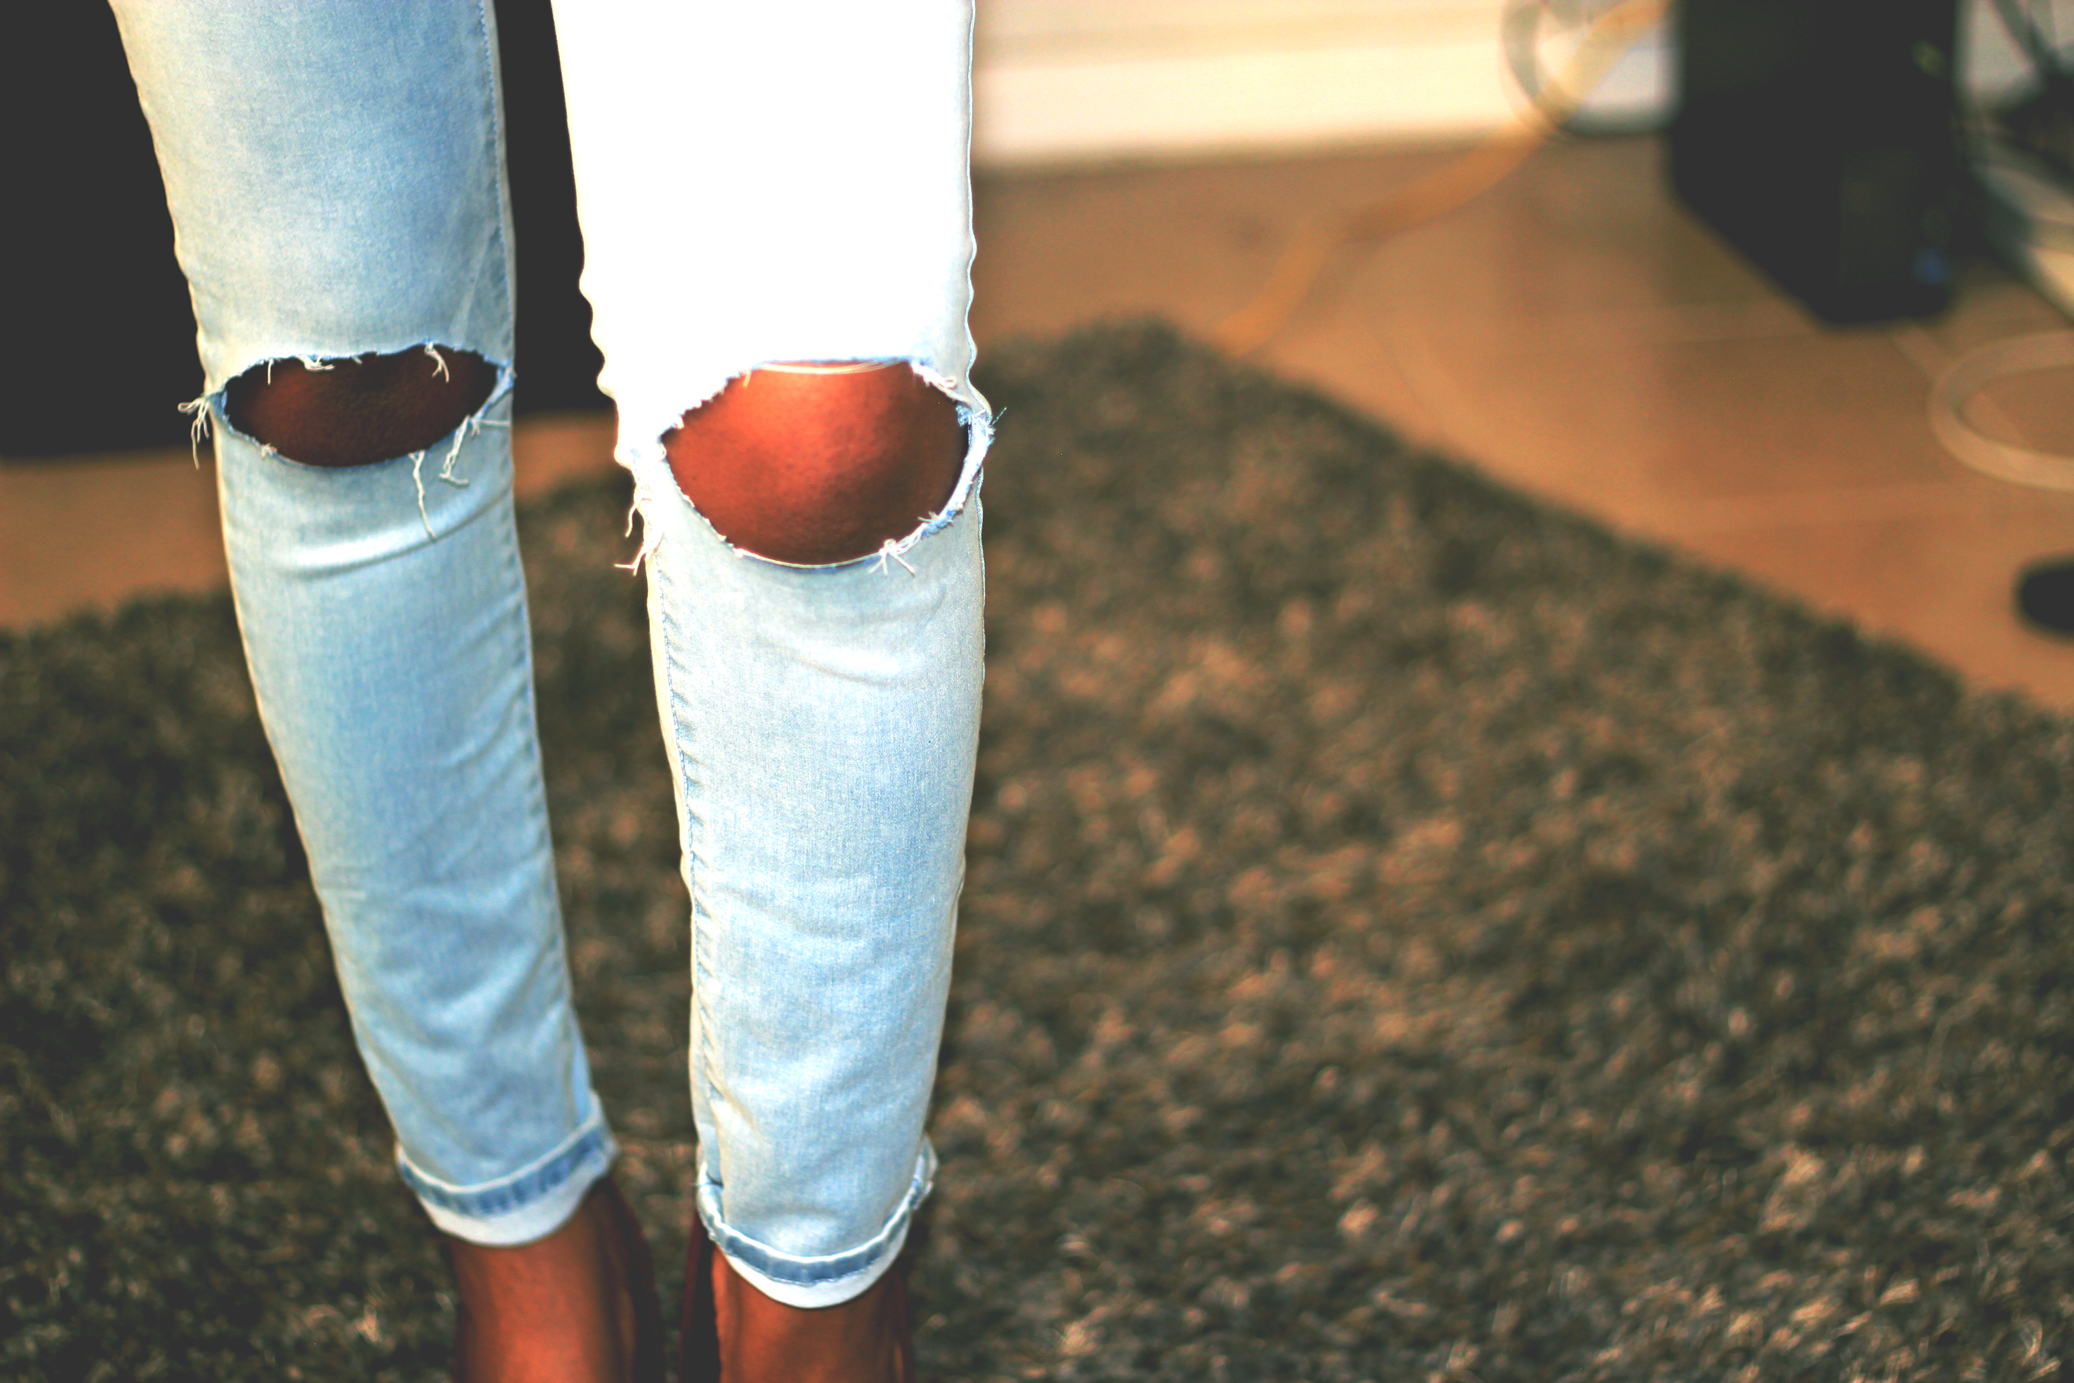
Step 5: Put the pants back on and admire your fine work! If you like this style, you can surely stop right here. However, I wanted the holes to be just like my hair, big and dramatic.

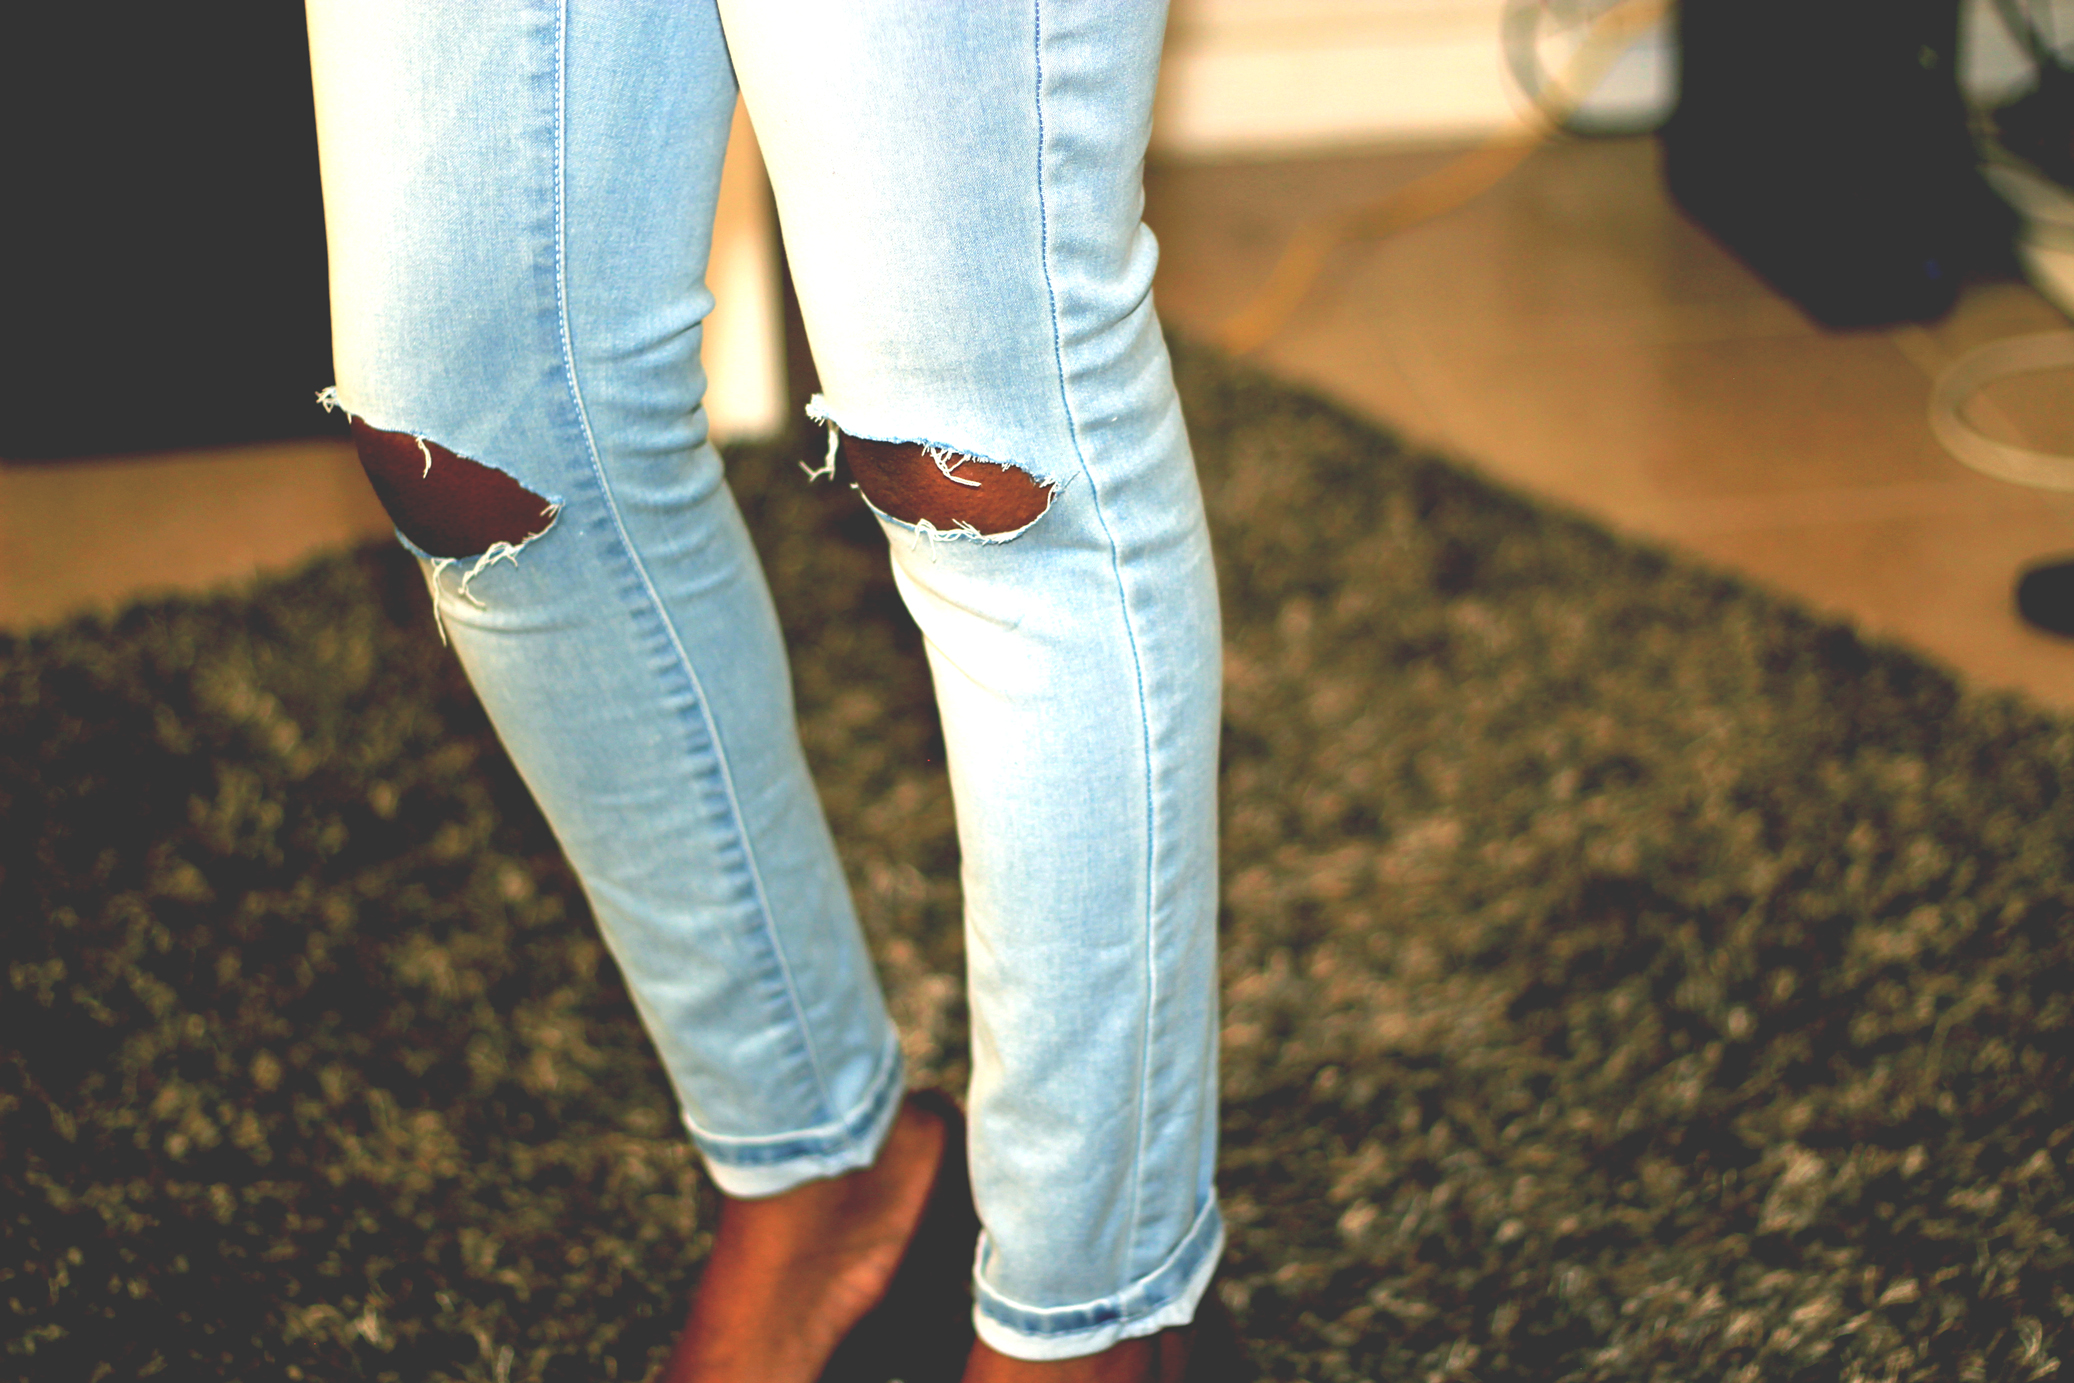
Step 6: To create even bigger holes, cut about 0.5 – 1.0 inch of material away from the top or bottom of the holes. I recommend removing the pants again for this step, for the reason listed previously AND because it’s a bit difficult to cut straight while the pants are still on.
Step 7: Run the sharp end of the scissors (or use a cheese grater) along the rim of the holes to bring out some of the fringe. Also, feel free to rip the holes more open with your hands, as wide as you’d like! I say, the bigger the better!

There you have it! Now get out there and strut your stuff you sexy thing you!